

The Easiest Homemade Pork Bao Buns—No Skills Required
Let’s be honest, making bao buns at home can feel a little intimidating. For me, the hardest part has always been the perfect pleats.
Those folds take practice, and getting them to look neat is honestly an art. Then there’s the wrapper; rolling each one evenly takes time and skill. But this recipe is the opposite of all that. It’s simple, no perfect pleats required, and no rolling out wrappers one by one.
The dough is completely no-knead, which already takes a lot of pressure off. You just mix everything together, let time do the work, and you’ll end up with a soft, slightly sticky dough that turns beautifully fluffy after steaming. No complicated techniques.

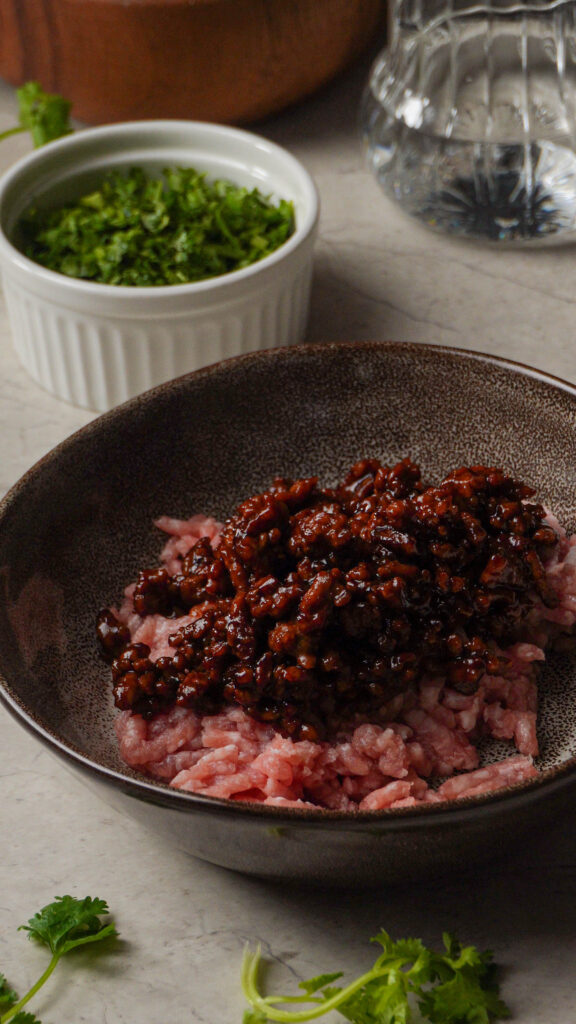
The filling is where all the flavor comes in. Cooking half of the pork first gives it that rich, slightly caramelized taste, while mixing it with the raw portion keeps everything juicy and tender. Once it’s steamed, the inside stays moist and packed with flavor, and it pairs perfectly with that light, pillowy dough.
And when it comes to shaping, you really don’t need to stress. Yes, you can pleat if you want to, but this dough doesn’t rely on perfect folds to turn out well. You can simply pinch and seal. In fact, once they’re steamed, the surface smooths out anyway, so even the “imperfect” ones end up looking great.
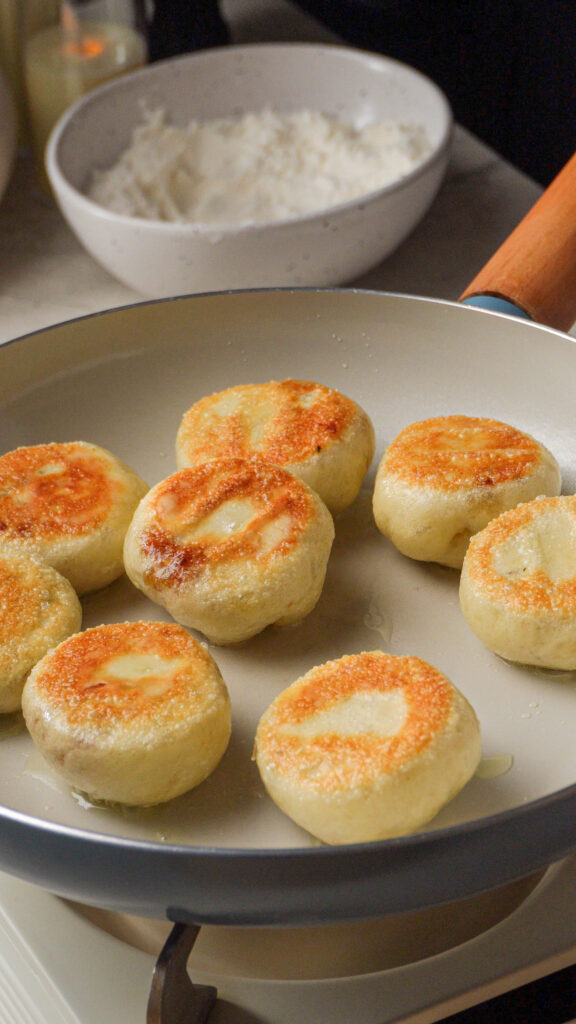
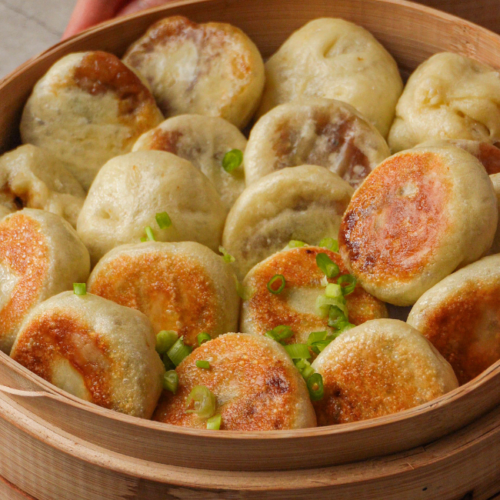
What I love most about this recipe is that you actually get two ways to enjoy it. The first is the classic version, soft, warm, and fluffy straight from the steamer. The second is my favorite: pan-fried. Once its steamed, just cook the buns in a little oil until the bottoms turn golden and crispy, then serve with chili oil. That contrast between the crispy base and juicy filling is so good.
If you try this recipe, let me know how it turns out—I’d love to hear what you think.
Easy Mini Chinese Pork Bao Buns
PRINT RECIPE PIN RECIPEIngredients
Filling
- 350 g minced pork
- 1 tbsp soy sauce
- 2 tbsp hoisin sauce
- 1 tsp dark soy sauce
- 1 tsp sugar
- ¼ tsp five spice powder
- ¼ tsp ginger powder
- ½ cup cilantro (finely chopped)
Dough
- 300 g all-purpose flour
- 1 tsp instant dry yeast
- ½ tsp salt
- 230 ml water
INSTRUCTIONS
Prepare the Filling
- Divide the minced pork into two equal portions.
- Heat a pan with a little oil over medium-high heat. Add one portion of pork and cook until lightly browned and the fat renders (you’ll hear steady sizzling and see some oil released).
- Add soy sauce, dark soy sauce, and hoisin sauce. Stir-fry for 1 minute until fragrant.
- Add sugar, five spice powder, and ginger powder. Mix well, then remove from heat.
- Let the cooked pork cool slightly, then combine it with the remaining raw pork and chopped cilantro.
- Mix until well combined. Cover and refrigerate while preparing the dough.
Make the Dough
- In a large bowl, combine water, yeast, flour and salt. Mix until a soft, sticky dough forms.
- Cover and proof for 1 hour, or until doubled in size.
Shape the Buns
- Flour your work surface with a considerate amount of flour. Transfer the dough and gently shape it into a log. The dough suppose to be sticky, dust more flour whenever needed.
- Divide into 32–34 equal portions. Roll each into a ball.
- Flatten each ball into a round wrapper (thinner edges, slightly thicker center) with your hands.
- Hold the wrapper in your non-dominant hand. Add about 1½ tsp filling right in the center.
- Use the thumb and index finger of your dominant hand to pinch a small fold (pleat) at the edge to create your first pleat. From there, move slightly to the side, grab another small section of dough, and fold it toward that first pleat, pinching them together. As you continue, repeat the same motion, grab, fold inward, and pinch. Use your non-dominant hand to rotate the bun as you work your way around. Continue folding and pinching until you have worked your way around the entire circumference.
- Once you reach your starting point, gather the remaining edges together, pinch them firmly, and give a slight twist to seal the bun completely.
- Because of the soft dough, the folds will smooth out after steaming, so if you don’t really have to create the folds, you could just simply seal it by pinch the edges together.
- Place buns on parchment paper inside a bamboo steamer (leave space between each). Cover and proof for 20 minutes until slightly puffy.
- Start with cold water in the pot. Place the steamer over the pot and turn heat to high, and steam for 12 minutes.
- Turn off heat and let buns rest in the steamer for 3 minutes before opening.
- Serve warm.