

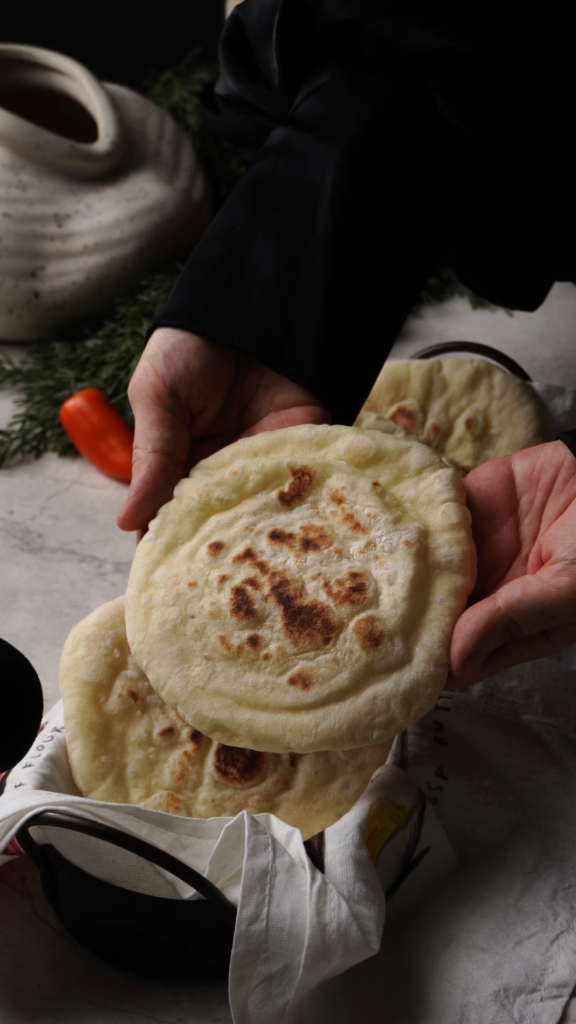
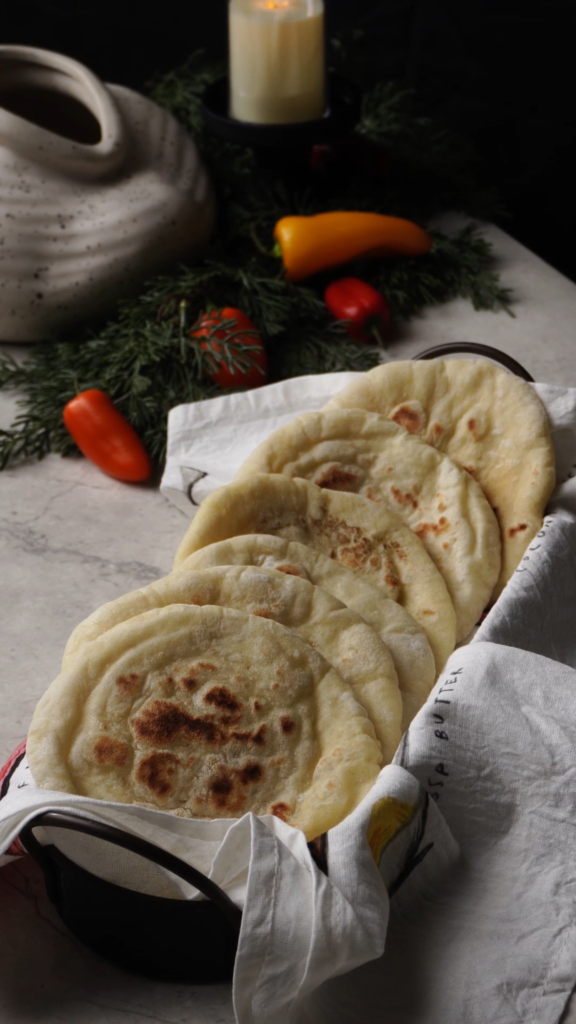
How to Get the Perfect Puff Every Time
There is nothing more satisfying in the kitchen than watching a flat circle of dough suddenly inflate into a perfect, hollow balloon. But if you’ve ever tried making homemade pita bread, you know the “puff” can be elusive. Sometimes it works, sometimes you end up with delicious but flat bread.
After a lot of trial and error, I’ve perfected a no-oil pita bread recipe that works every single time. The best part? You only need four pantry staples: flour, yeast, water, and salt.
It’s Not the Dough—It’s the Thermodynamics
Most people think the secret is in the kneading or the yeast. This recipe doesn’t require kneading, by the way. The “puff” is actually all about heat management. To get that pocket, you need a blast of hot air to steam-inflate the interior before the outside crust hardens too much.
The “Anti-Cast Iron” Rule
Here is a hot take: Stop using cast iron for pita. I know, we love our cast iron for everything else, but it retains heat too well for this. It gets so hot that it usually burns the bottom of the dough before the steam has a chance to blow it up.
Two Keys to the Perfect Puff:
- The Right Pan Size: Use a pan that is roughly the same size as your rolled-out dough. This concentrates the heat and prevents the hot air from “scattering” around the edges. You want that heat focused directly under the bread.
- The Sweet Spot Temp: You need high medium heat, but not “smoke-alarm” heat. If the pan is too big or too cool, the dough just dries out. If it’s just right, the bread will soar.
How to Make No-Fail Pita
- Mix & Rise: Combine your ingredients and let the dough double in size.
- Roll Thin: Consistency is key. Aim for an even thickness so it inflates uniformly.
- The Sear: Drop it onto your pre-heated (non-cast iron!) pan. Once you see small bubbles, flip it, wait 30 seconds, then flip it again. Then wait for the magic to happen.
Have you been struggling with flat pitas? Give the pan-size trick a try and let me know if it solves your “puff” problems!
4-Ingredient No-Knead Pita Bread
PRINT RECIPE PIN RECIPEIngredients
- 210 g all purpose flour
- 2 g salt
- 2 g instant dry yeast
- 130 g water
INSTRUCTIONS
- In a large mixing bowl, combine the water and yeast. Stir until the yeast is fully dissolved.
- Add the flour and salt. Mix until a rough dough forms and no dry flour remains. Cover the bowl with a clean kitchen towel or plastic wrap. Let the dough rest at room temperature for 1.5 hours.
- Transfer the dough to a clean surface and gently press to release the air. Divide the dough into 6 equal portions (approximately 56g each if using a scale).
- Roll each portion into a ball, cover the balls, and let them rest for 10 minutes. If the dough feels a bit tacky, lightly dust your hands and the dough with flour.
- Using a rolling pin, roll each ball into a disc roughly 11–12 cm (4–5 inches) in diameter.
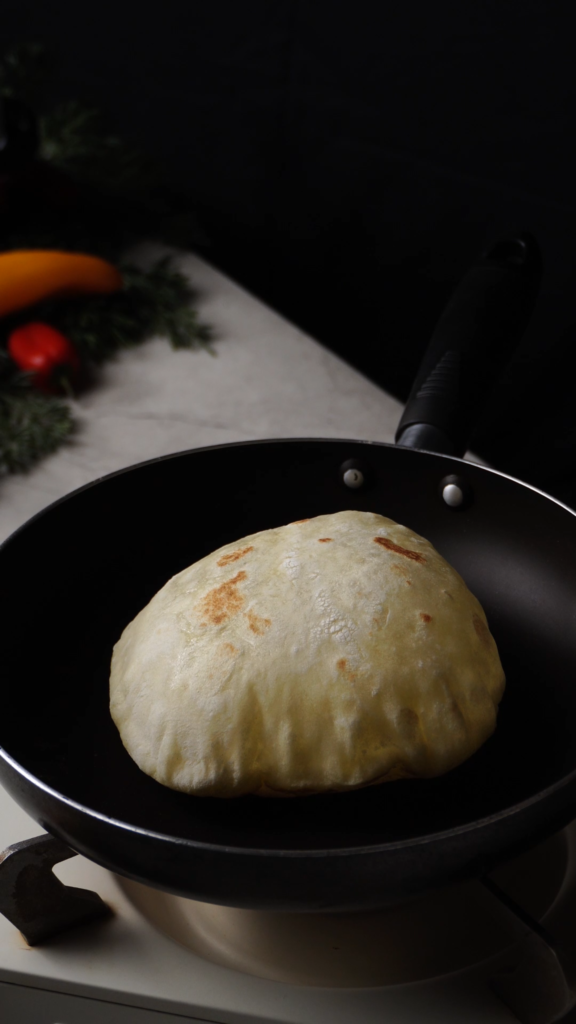
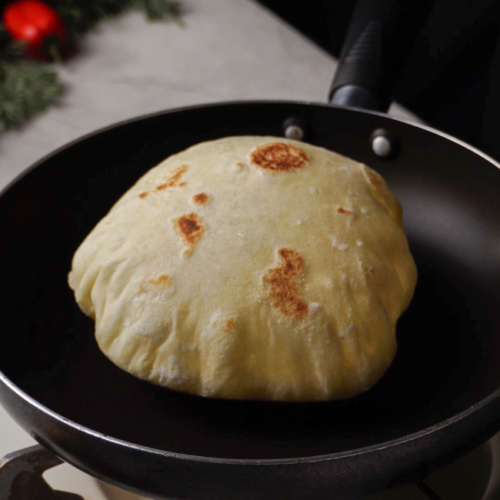
- This is the most important step! Place a medium-sized pan (avoid cast iron) over medium heat for 2 minutes. Right before you start cooking, turn the heat up to medium-high.
- Place the disc into the hot pan, one at a time. Cook until you see small bubbles appear on the surface; it takes about 1 minute. Flip the disc, and cook the second side for 30 seconds. Flip it back to the original side and cook for another 10–20 seconds. At this point, the pita should begin to puff up like a balloon.
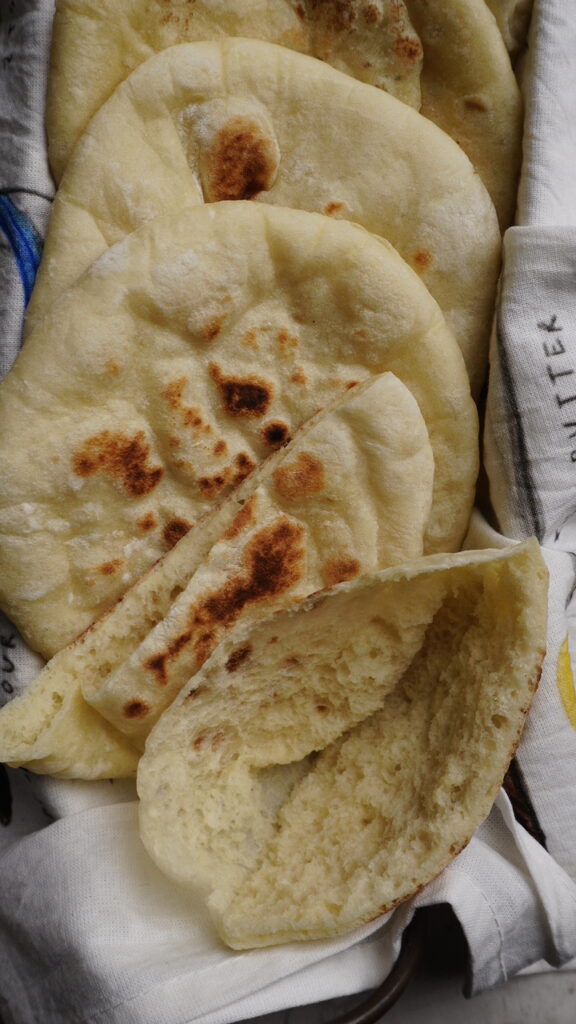
- Once the bread has fully inflated, flip it one last time and cook for 30 seconds to ensure the interior is perfectly cooked.
- Transfer the hot pita to a plate and immediately cover it with a clean kitchen towel. This traps the steam, keeping the bread soft and pliable instead of crispy.