
From Cookies to Cake
If you have Oreos, some white chocolate, and a bit of butter, this is your sign to make this crunchy, creamy no bake Oreo cake.
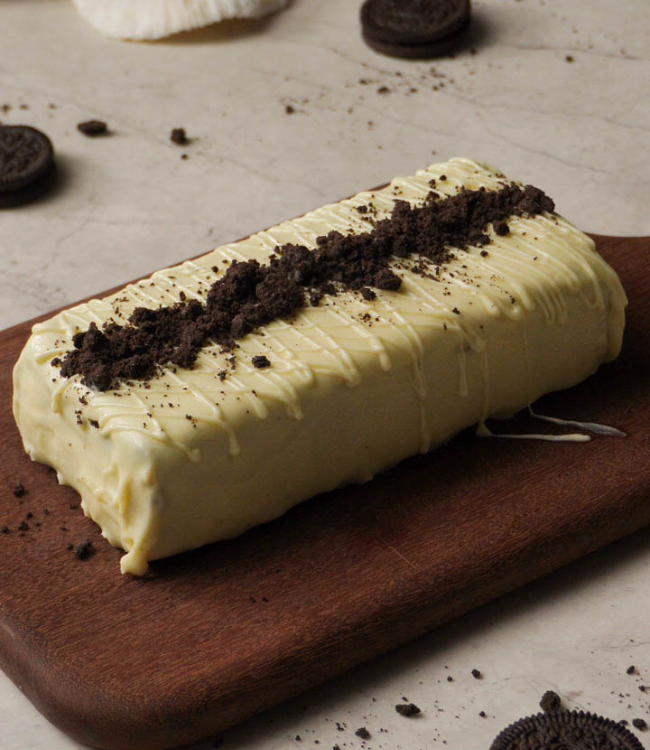
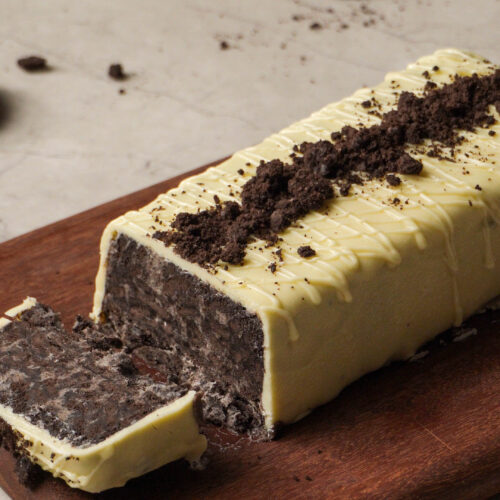
This cake is basically an elevated version of a cookies-and-cream bar. It’s rich, satisfying, and thankfully, pretty hard to mess up. There’s no flour, no eggs, and absolutely no baking involved. It’s just pure, crunchy biscuits held together by a velvety white chocolate base. While white chocolate and Oreo are very sweet, using salted butter in the recipe adds a much more sophisticated flavor. Honestly, my whole family is obsessed with it.
3-Ingredient Oreo Transformation
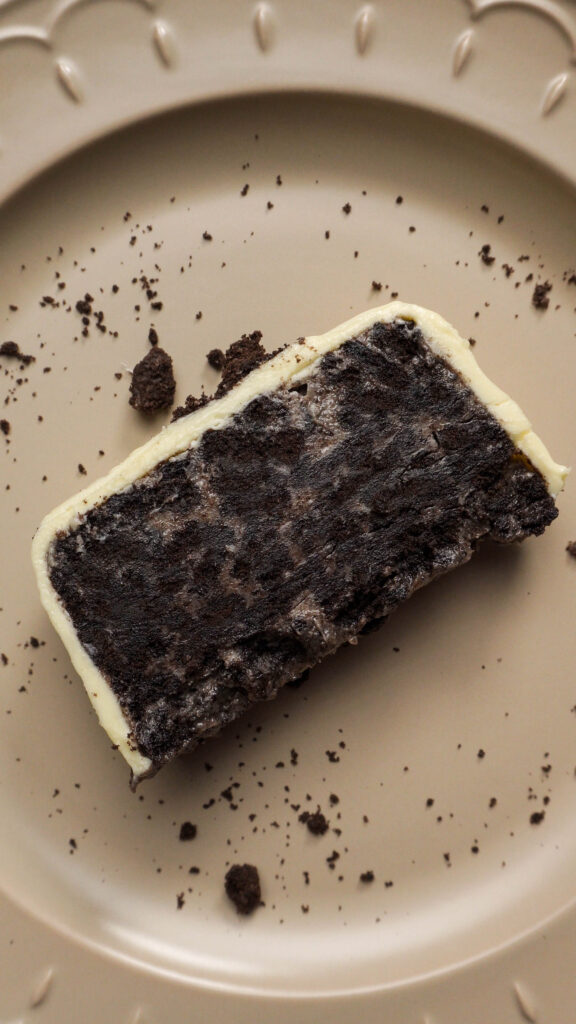
First, twist the Oreos apart and scrape off the cream. Then, break the cookies up by hand. Don’t overthink it, you want chunks, not crumbs. This is what gives the cake that incredible “cookies and cream” texture.
Second, beat the softened butter until it’s pale and fluffy, then fold in your melted white chocolate. Make sure the chocolate isn’t hot when you add it, or your butter will turn into a sad, greasy puddle. Toss in the Oreo pieces and mix until every bit is coated in that white chocolate base.
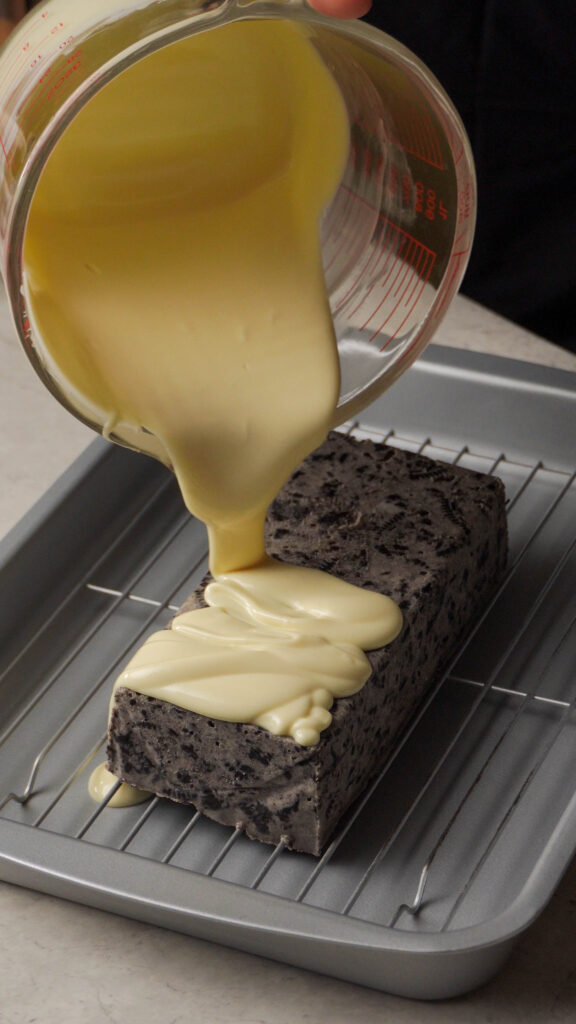
Last, line a 7×3×3-inch loaf pan (if you don’t have the exact size, don’t worry. Since the cake isn’t baked, we don’t need to worry about rising. You can use just about any size pan you want) with parchment paper and add the mixture in three layers. After each layer, use a flat-bottomed glass or a presser and press down hard. This step keeps the cake from falling apart into a pile of crumbs when you slice it later. And then pop it into the fridge for about 4 hours.
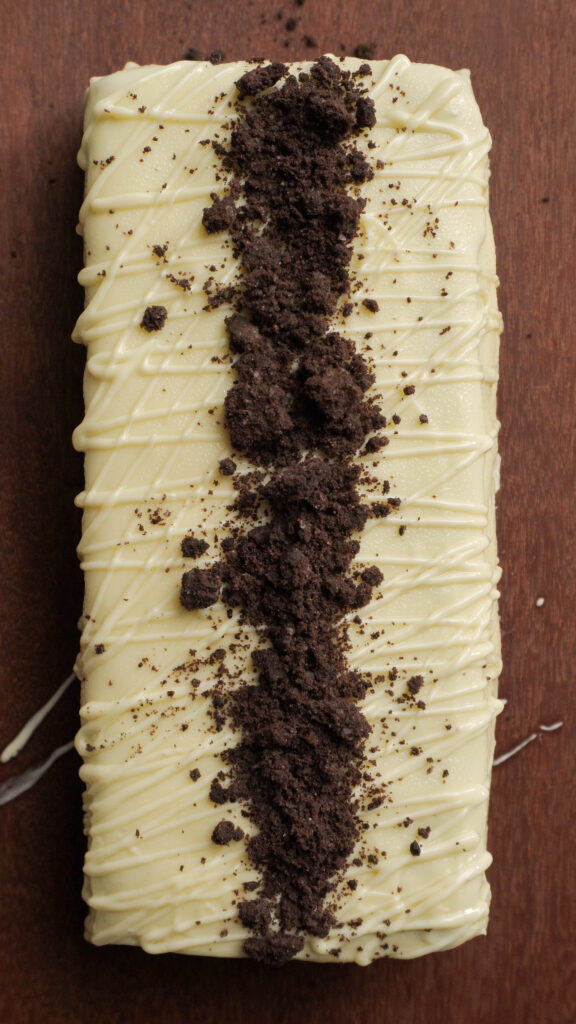
Once it’s firm, take it out and set it on a wire rack. Pour more melted white chocolate over the top until the whole cake is covered. If you end up with bare spots, just scoop up the drips from the tray underneath and patch them up. Pop it back in the fridge for 20 minutes to let that coating harden, and you’re done!

If you want those super clean edges, dip your knife in hot water and wipe it dry before every cut. It’ll glide right through the chocolate without cracking it.
If you try this, let me know! I’d love to see how you like it!
3 Ingredient No Bake Oreo Cake
PRINT RECIPE PIN RECIPEIngredients
- 30 Oreo sandwich biscuits
- 113 g white Chocolate (for the base )
- 113 g softened salted butter
- 227 g white chocolate (for the coating)
INSTRUCTIONS
- Twist the Oreo sandwiches apart. Scrape the cream off.
- Break the chocolate biscuits by hand into small, chunky pieces. Avoid turning them into fine crumbs; you want texture!
- In a medium bowl, whip the softened butter until it is light, fluffy, and pale in color.
- Melt 113g of white chocolate using a double boiler (a bowl over a pot of simmering water) or microwave(on high, stir every 15 seconds until smooth). Let the white chocolate cool to room temperature before using it.
- Let the chocolate cool to room temperature (it should still be liquid but not warm to the touch). Fold the chocolate into the whipped butter until smooth.
- Add the Oreo pieces and mix until every biscuit chunk is coated.
- Line a baking pan with parchment paper. Add the mixture in three additions.
- Use a flat-bottomed glass or a meat presser to firmly pack down each layer. This prevents the cake from crumbling when sliced.
- Refrigerate for at least 4 hours until completely firm.
- Remove the chilled cake from the pan and peel off the parchment. Place the cake on a wire cooling rack with a clean baking tray underneath to catch drips.
- Melt additional 227g white chocolate. Pour it slowly over the center of the cake, use a offset spatula to gently guide it over the edges and sides.
- If there are bare spots, scrape the chocolate from the tray below, re-melt it if necessary, and apply a second coat.
- Return the cake to the fridge for 20 minutes to let the coating set.
- Slice it up and dig in!